Before and After: Removing a Shine on a Doll's Cheek
I wrote the other day about how to properly pack and ship a doll. The post was inspired by a doll I had just received that had been improperly packed, causing a deep shine on one cheek.
I probably could have returned her if I chose, since she didn't arrive in new condition as advertised. But I decided to scold and block the seller instead, and try my hand at fixing her myself. I've repaired shines on many AG dolls, and although this one was in the blush, I was fairly confident I could do it. I had to fix a shine and reblush my Nanea once, and was reasonably pleased at my results then too.
This one was a little tougher than I expected, as Ruby Red dolls' vinyl is a little different than AG, and their faces more heavily painted. Plus it turned out the shine was deeper than I realized, and had essentially flatspotted her cheek in that area.
I started out with just a dry Magic Eraser, as that's how I remove most shines from American Girl dolls. The magic eraser mitigates the shine without making the vinyl shiny, which I like.
The Magic Eraser immediately started removing her blush, which I expected. Unfortunately, with the depth of this shine, the Magic Eraser alone wasn't entirely removing it. Also, due to the different quality of the vinyl, the Magic Eraser was making the cheek shinier than I wanted. So I had to break out the micromesh.
My micromesh is ultra fine sandpaper. The paper is much easier to work with in small areas like this than the pads, although on the whole I prefer the finish the pads produce a little better. The micromesh got rid of the shine, but oversanded her cheek a little, so then I had to use a finer grit and finally the Magic Eraser again to get rid of the sandpaper-like marks.
I use chalk pastels for blushing. I scrape some off onto a surface and apply it with a makeup brush, just like real blush on a person. Then I rub it in a little with my fingers and wipe off any excess with a damp paper towel. I didn't have the exact color of her original blush, but with a blend of three different colors, I was able to get pretty close. It's a touch more orange than her original, but I'm relatively pleased with it.
Here are the results.

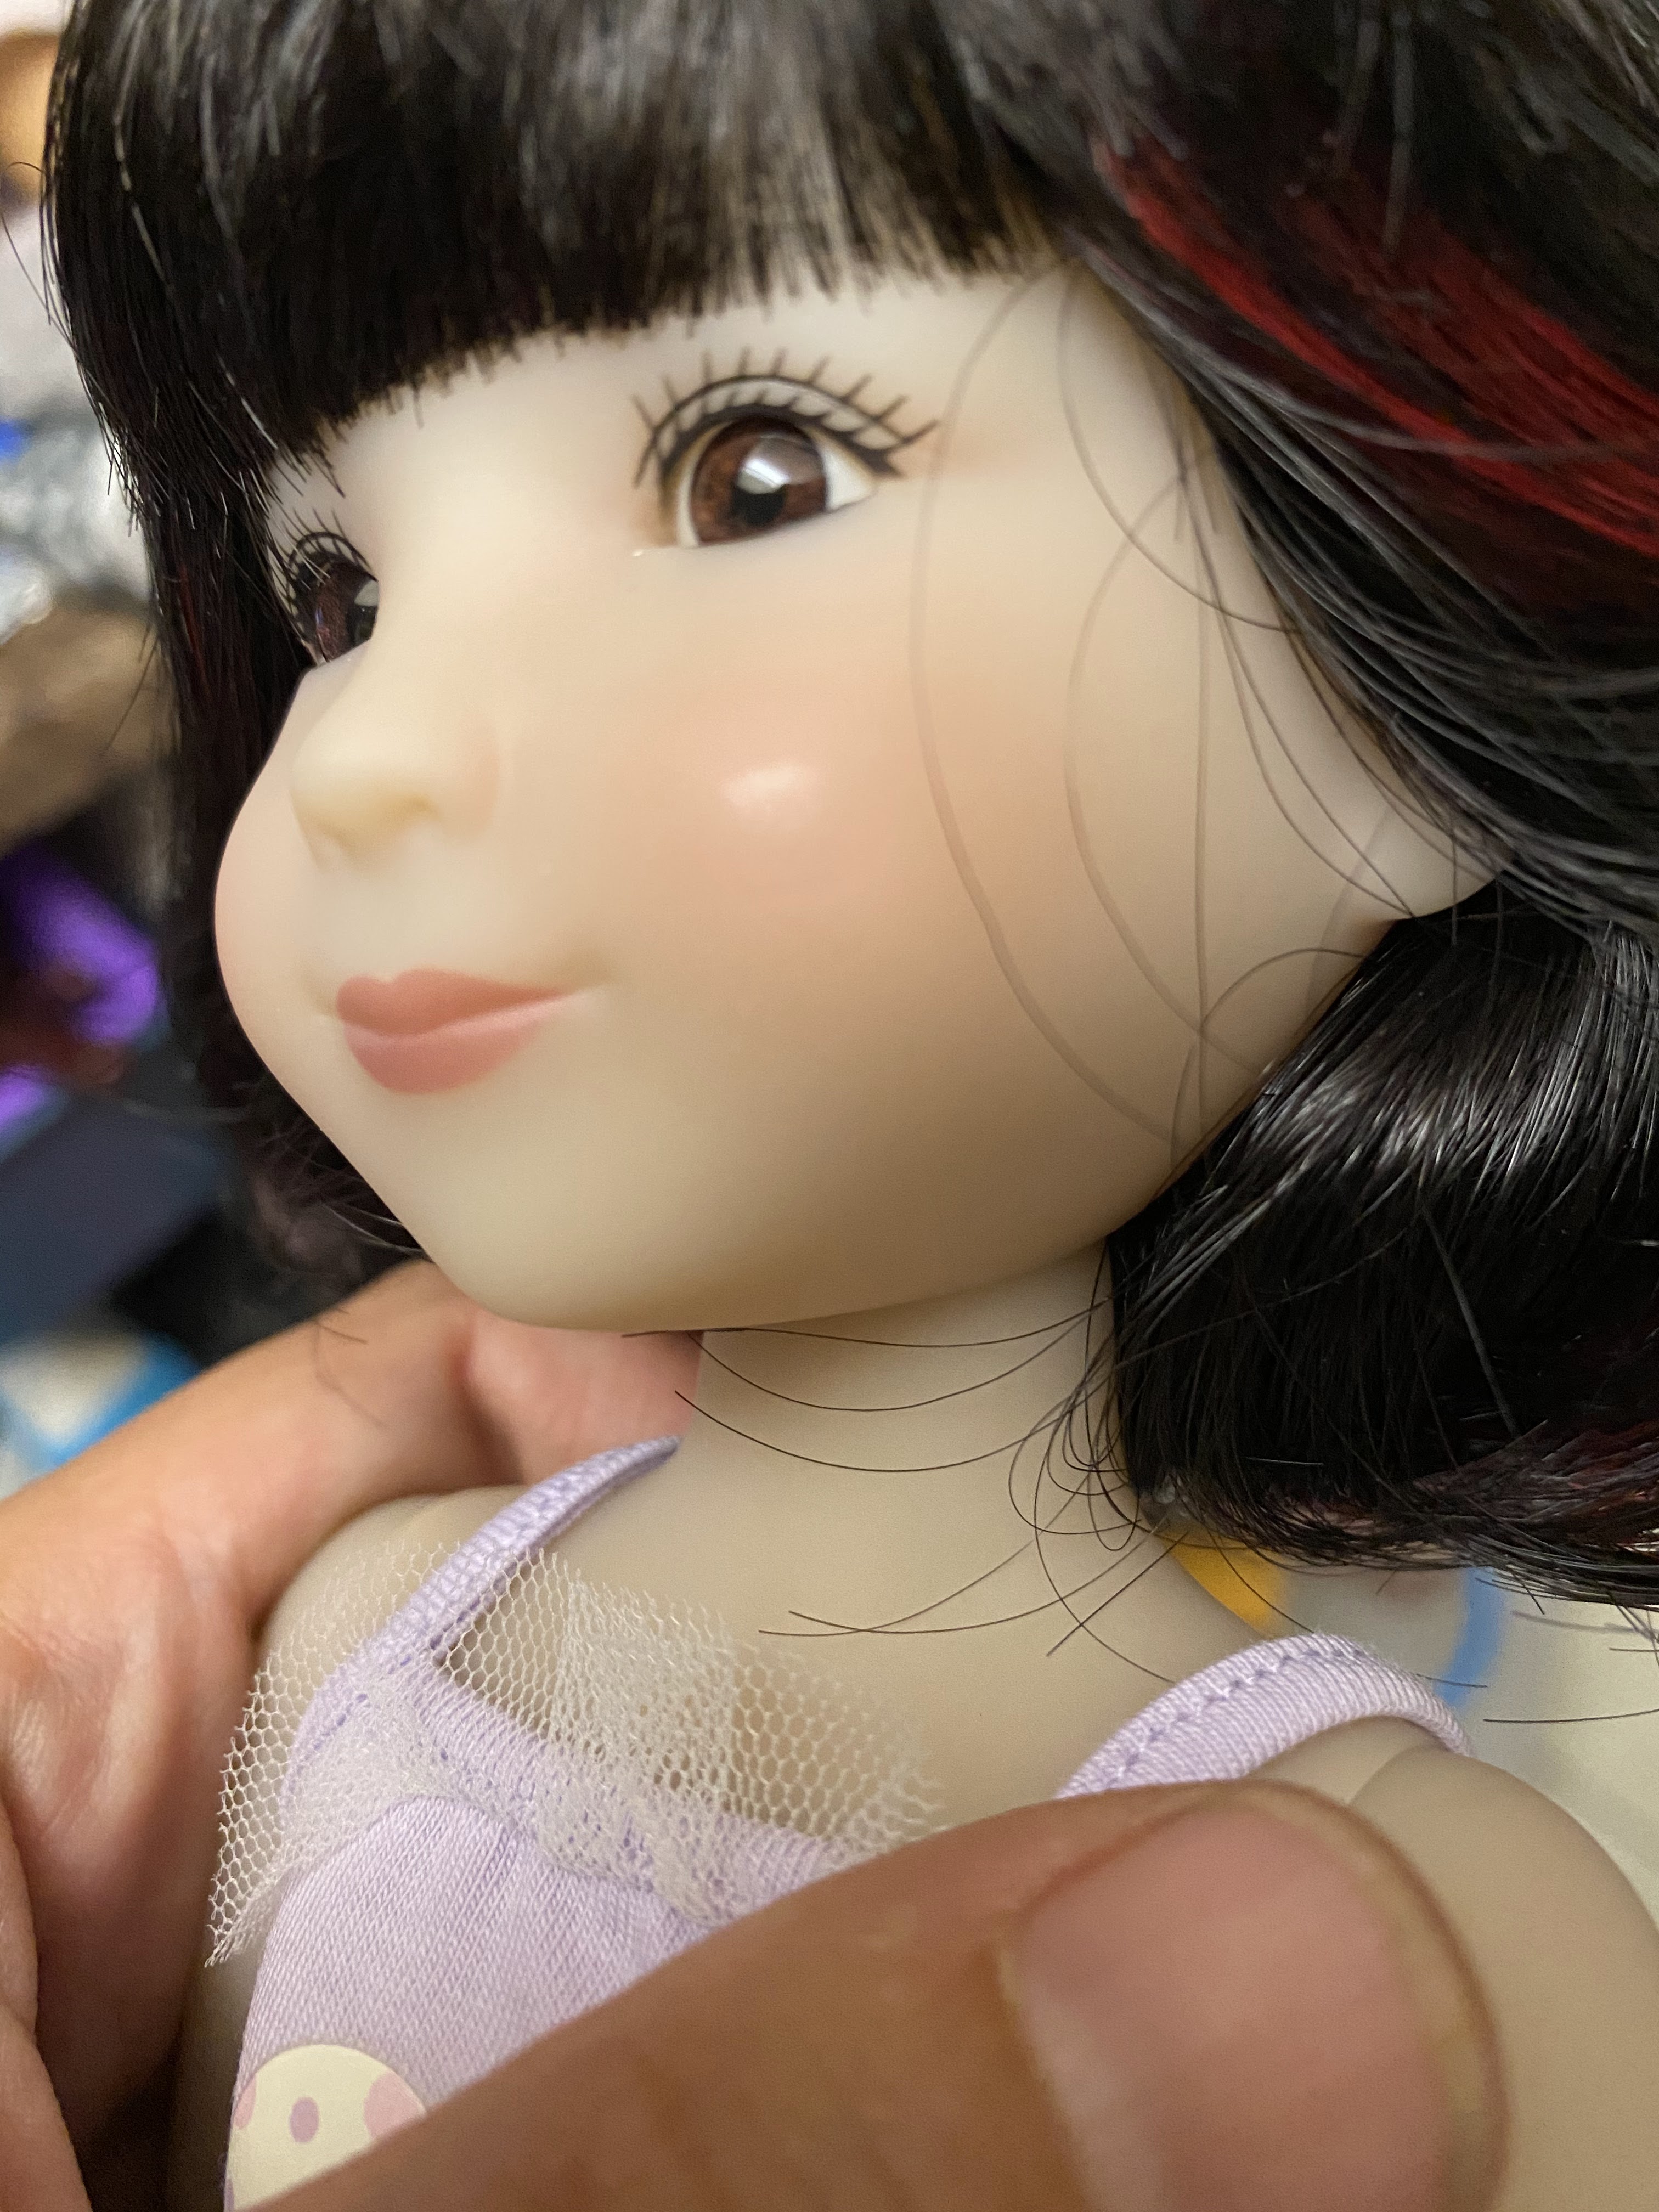
Besides the color of the blush being slightly off, her cheek is also slightly more shiny than I would like, and I also accidentally rubbed her eye a little with the micromesh. So I might not be done with her quite yet. But overall, I'm pleased that I matched the blush as closely as I did, and that I was able to remove the flatspotted shine.
For reference, here is the photo of the damage.
I'll post again if I decide to try to perfect the repair!


Comments
Post a Comment